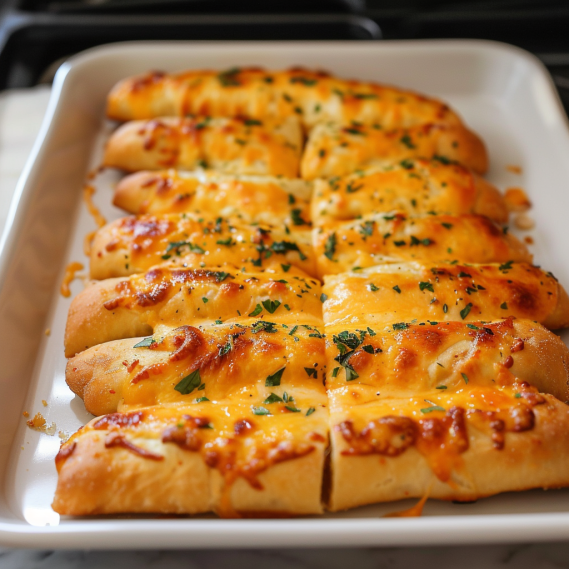
Homemade Cheesy Breadsticks: A Gooey and Delightful Treat 🧀🍞✨
1. Introduction: The Irresistible Allure of Homemade Cheesy Breadsticks
Who can resist the irresistible allure of Homemade Cheesy Breadsticks? These aren’t just any breadsticks; they’re a symphony of flavors and textures, perfectly baked to a golden perfection that tantalizes the senses. These cheesy delights are not only surprisingly easy to make but also guaranteed to be a crowd-pleaser, perfect for satisfying cravings and bringing joy to any meal. Whether enjoyed as a delightful appetizer to kickstart a dinner party, a comforting side dish alongside your favorite pasta, or simply a satisfying snack to munch on during movie night, they pair beautifully with a classic marinara sauce, a creamy garlic dip, or your own favorite concoction. They’re also a fantastic accompaniment to dishes like creamy tomato pasta or alongside some cheesy garlic chicken wraps. In this comprehensive article, we’ll take you through a detailed, step-by-step guide to creating these cheesy wonders right in your own kitchen, ensuring that every single bite is packed with that tantalizing gooeyness and unforgettable flavor you’re looking for! Get ready to impress your family and friends with your newfound cheesy breadsticks baking skills!
2. Ingredients: Gathering Your Cheesy Arsenal
To embark on your homemade cheesy breadstick journey, you’ll need the following ingredients. Fresh, high-quality ingredients will make a noticeable difference in the final product, so choose wisely!
- 2 cups all-purpose flour: This forms the base of our breadsticks, providing the perfect structure.
- 1 packet (2 1/4 tsp) active dry yeast: The magic ingredient that makes our breadsticks rise to fluffy perfection.
- 1 tsp sugar: A touch of sweetness to activate the yeast and enhance the overall flavor.
- 1 tsp salt: Essential for balancing the flavors and controlling the yeast activity.
- 3/4 cup warm water (about 110°F): The perfect temperature to awaken the yeast and start the dough-making process.
- 1 cup shredded mozzarella cheese: The star of the show! Its melting properties create that irresistible gooeyness we all crave.
- 1/2 cup grated Parmesan cheese: Adds a salty, nutty depth of flavor that complements the mozzarella perfectly. You might also enjoy those breadsticks alongside some homemade flaky croissants!
- 1 tsp Italian seasoning: A blend of herbs that infuses the breadsticks with a classic Italian aroma and taste.
- 2 tbsp olive oil: Adds moisture and richness to the dough, resulting in a tender and flavorful breadstick.
3. Step-by-Step Instructions: From Dough to Deliciousness
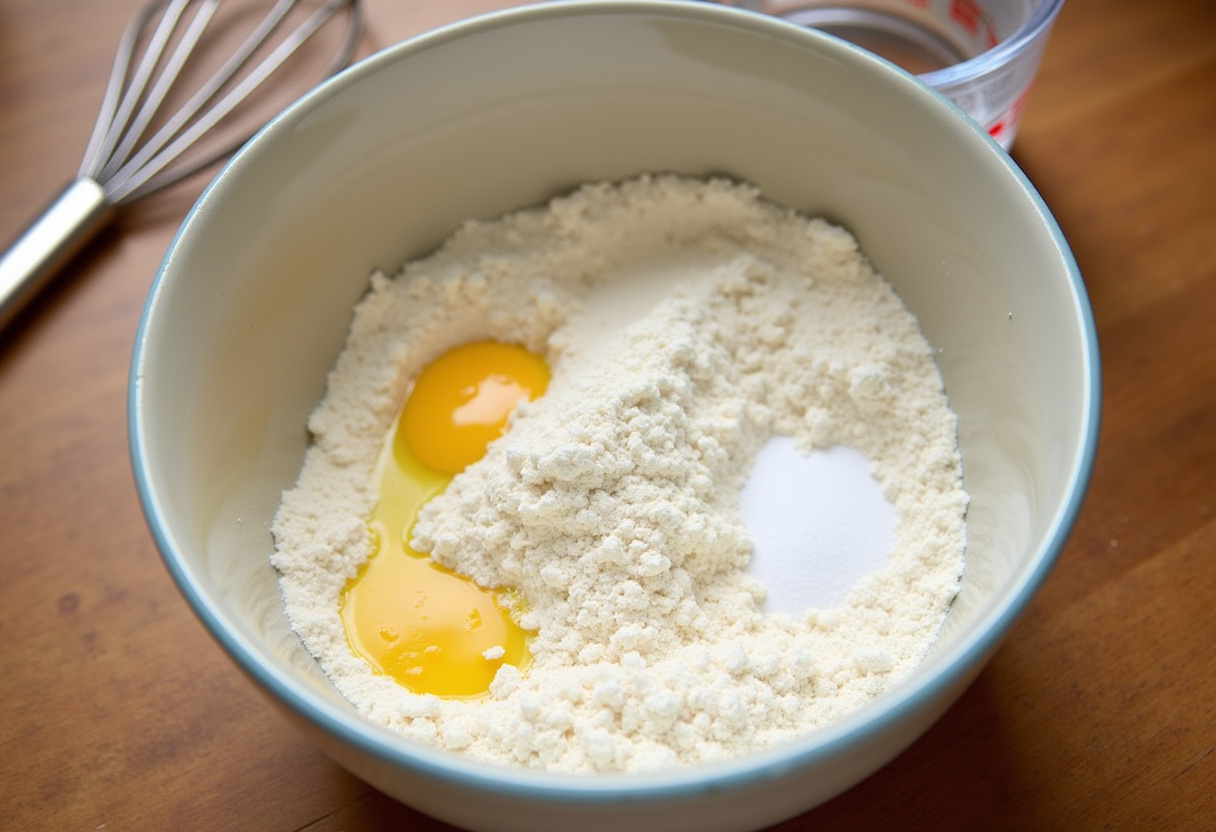
Step 1: Preparing the Dough – Activating the Flavor
In a large mixing bowl, combine the warm water, yeast, and sugar. Give it a gentle stir and let it sit undisturbed for 5-10 minutes, or until it becomes frothy. This indicates that the yeast is active and ready to work its magic. Next, gradually add the flour and salt, mixing slowly until a shaggy dough starts to form. Be patient and don’t add all the flour at once—you might not need it all! If you’re interested in other baking recipes check out Baking recipes.
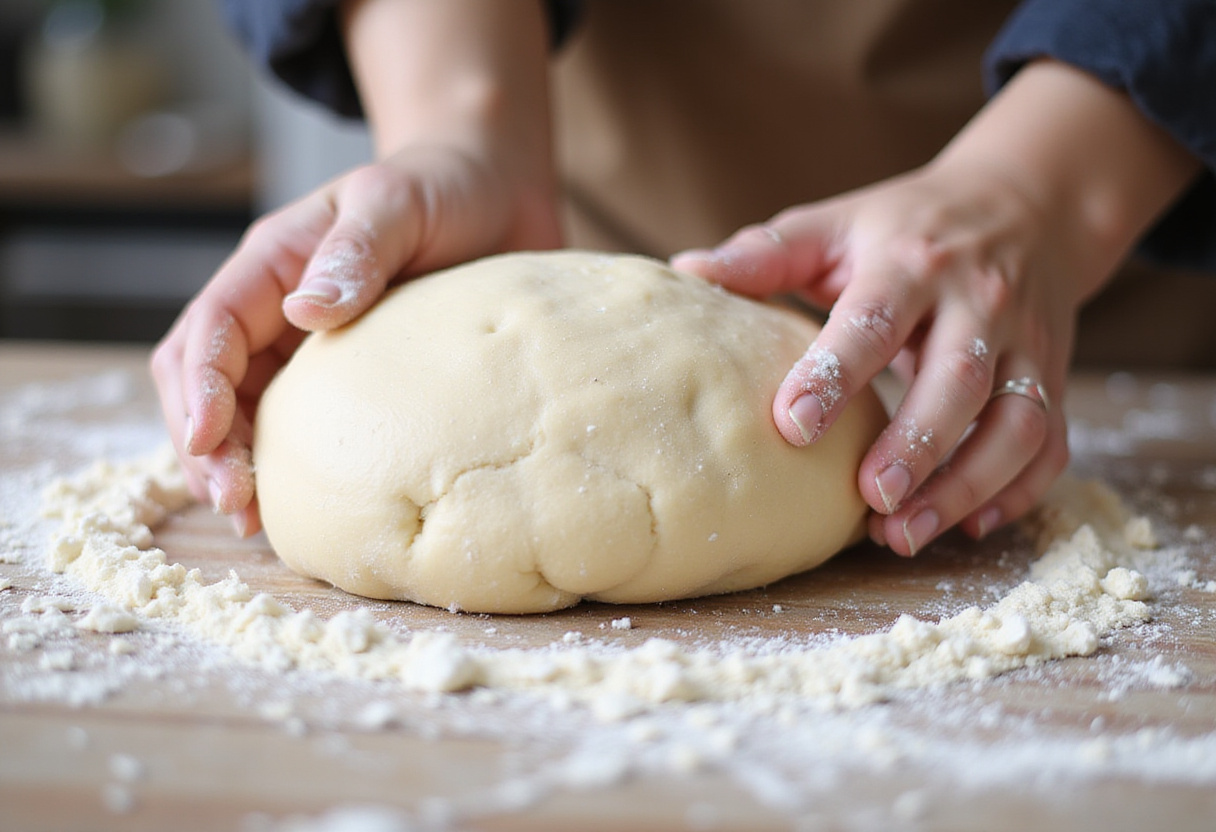
Step 2: Kneading the Dough – Developing the Texture
Lightly flour a clean, flat surface (like a countertop or large cutting board) and transfer the dough onto it. Now comes the fun part: kneading! Knead the dough for about 5-7 minutes, until it transforms from a sticky mass into a smooth and elastic ball. You’ll know it’s ready when it springs back slightly when you poke it. This step is absolutely crucial for achieving that signature chewy texture in your Homemade Cheesy Breadsticks. Proper kneading develops the gluten, resulting in breadsticks that are both tender and satisfyingly chewy. If you struggle at first, consider resting the dough for 5 minutes before starting again.
Step 3: Spreading the Dough – Creating the Canvas
Once the dough is beautifully kneaded and ready to go, lightly grease a baking pan (a 9×13 inch pan works perfectly) with olive oil or cooking spray. Place the dough in the center of the pan and use your fingers or a rolling pin to gently spread it out evenly, until it reaches all the edges of the pan. It’s important to ensure the dough covers the entire base, creating a uniform thickness that will allow for even baking and consistent cheesy coverage. Think of it as preparing the perfect canvas for the cheesy masterpiece to come! Perhaps you’d like to serve these with some flavourful crusty chewy french bread rolls?

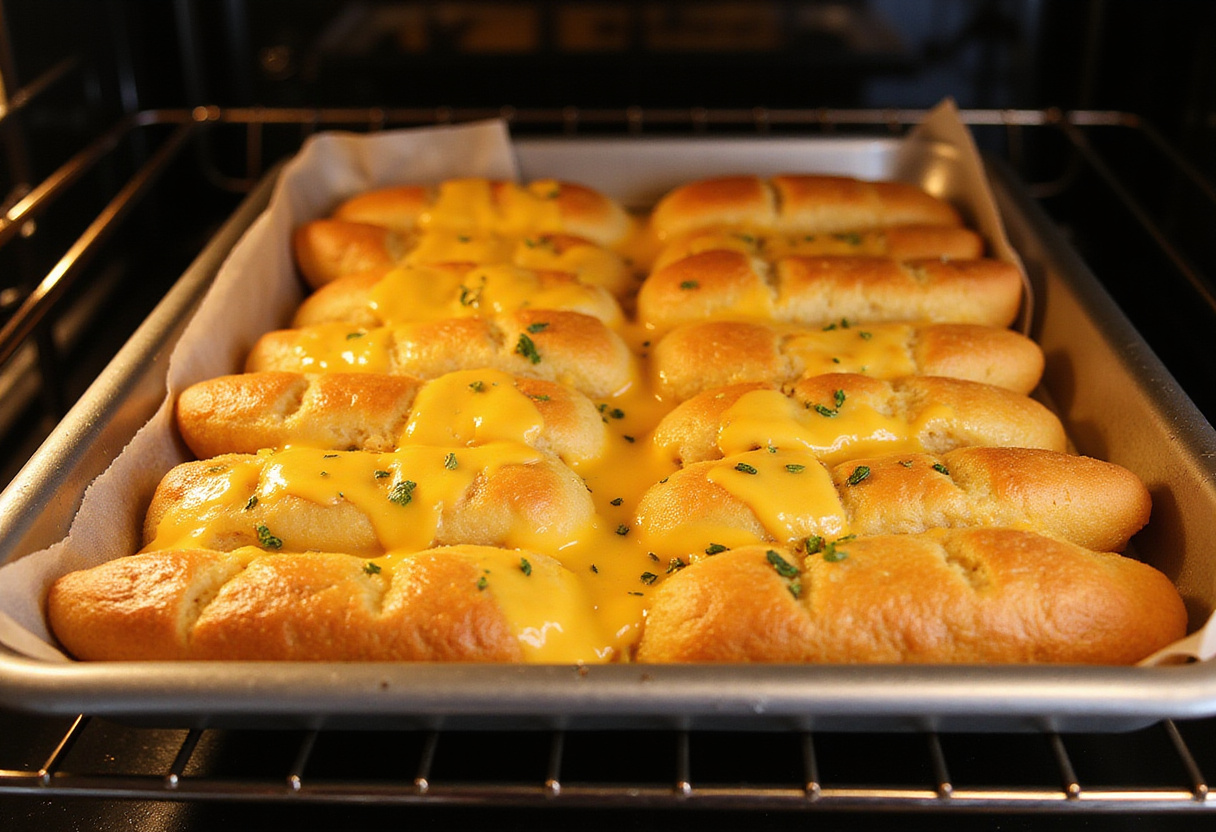
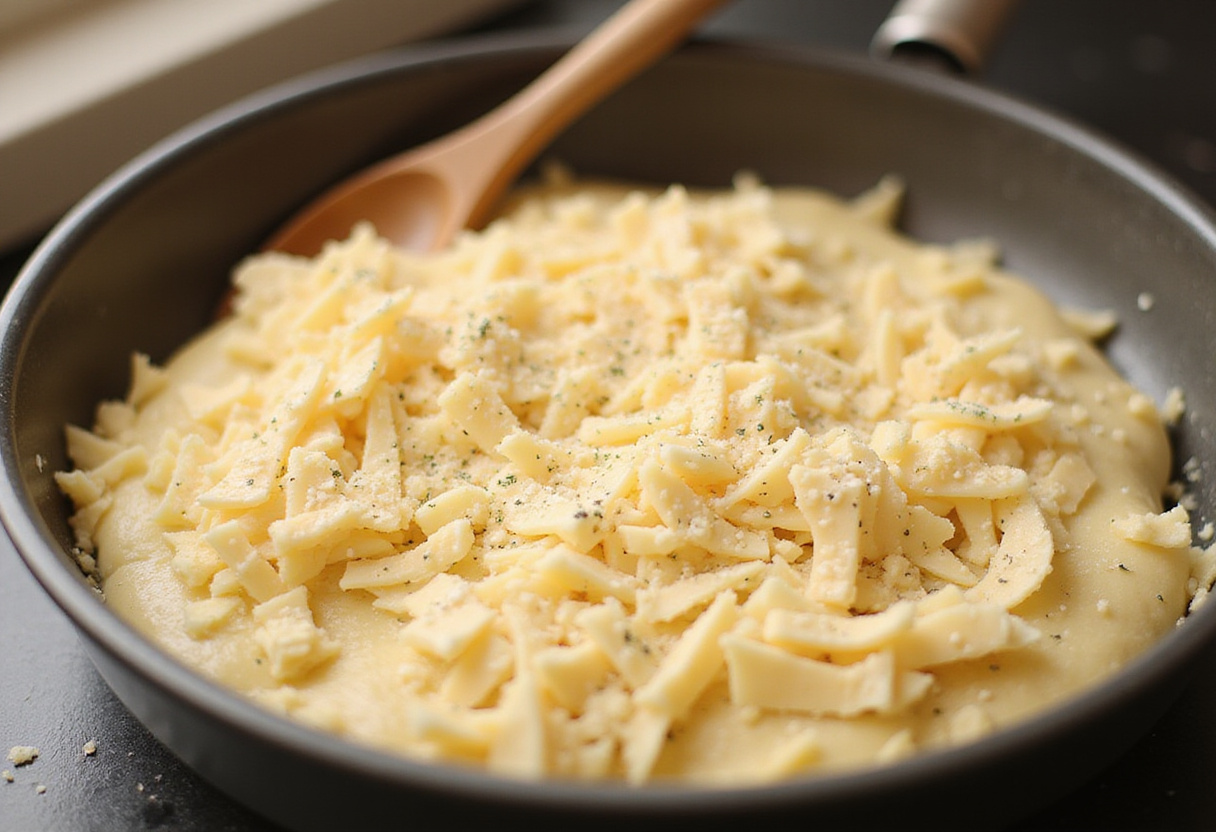
Step 4: Adding the Cheese Topping – The Grand Finale
Preheat your oven to 375°F (190°C). While the oven is heating, it’s time to add the cheese! Generously sprinkle the shredded mozzarella and grated Parmesan cheese evenly over the entire surface of the dough, ensuring every inch is covered in cheesy goodness. Don’t be shy—the more cheese, the better! Next, sprinkle the Italian seasoning over the cheese for that classic Italian flavor. For an even more intense flavor, you can melt a tablespoon of butter and brush it over the dough before adding the cheese and seasoning. Finally, and this is a *chef’s secret*, allow the breadsticks to rise for another 15 minutes in a warm place before baking. This final rise will result in even lighter and fluffier homemade cheesy breadsticks.
4. Baking Your Breadsticks – The Moment of Truth
Carefully place the prepared baking pan into the preheated oven and bake the breadsticks for about 20-25 minutes, or until they are beautifully golden brown and the cheese is melted, bubbly, and slightly golden on top. Keep a close eye on them during the last few minutes to prevent burning. The aroma that fills your kitchen during this stage is simply irresistible – a promise of cheesy, garlicky goodness! If you want to learn more about making breadsticks from scratch, check out this external link.
5. Storing Your Cheesy Breadsticks – Keeping the Goodness Alive
Allow the freshly baked Homemade Cheesy Breadsticks to cool slightly in the pan before cutting them into individual strips. To maintain their optimal texture and flavor, store them in an airtight container at room temperature for up to 3 days. To prevent them from becoming soggy, place a layer of paper towels in the bottom of the container to absorb any excess moisture. For longer storage, consider freezing them in a freezer-safe bag or container. When ready to enjoy, simply reheat them in a preheated oven or microwave until warmed through. These breadsticks might be ideal to eat after having a Blueberry breakfast bake
6. Serving Suggestions – Unleashing the Flavor Potential
Serve your warm, homemade cheesy breadsticks immediately with your favorite dipping sauces. Classic marinara sauce is always a winner, but don’t be afraid to get creative! Garlic butter, ranch dressing, pesto, or even a spicy sriracha mayo can elevate your breadstick experience to a whole new level. These cheesy breadsticks are perfect for game days, family dinners, pizza night, or any occasion where you want to impress your guests with a homemade treat. They also pair perfectly with soups, salads, and pasta dishes. If you enjoy baking, why not try making delicious cruffins.
7. FAQ – Your Cheesy Breadstick Questions Answered
Can I use whole wheat flour instead of all-purpose flour for these delightful cheesy breadsticks?
Yes, absolutely! You can substitute whole wheat flour for all-purpose flour, but keep in mind that it may result in a slightly denser and heartier texture. You might need to add a touch more water to the dough to achieve the desired consistency.
What creative additions can I incorporate into the dough to elevate the flavor profile of these cheesy delights?
The possibilities are endless! Consider adding herbs like dried basil, oregano, or rosemary to the dough for an extra punch of Italian flavor. You can also add a pinch of garlic powder or onion powder for a savory kick. For a spicy twist, try incorporating a pinch of red pepper flakes. You also get inspired from this peach pecan bread.
Is it possible to prepare these breadsticks ahead of time to streamline the baking process?
Yes, you certainly can! You can prepare the dough ahead of time, let it rise, and then store it in the refrigerator for up to 24 hours. When you’re ready to bake, simply take the dough out of the refrigerator, let it come to room temperature for about 30 minutes, and then proceed with spreading it in the pan, adding the cheese topping, and baking as directed. Alternatively, you can bake the breadsticks completely and freeze them for longer storage. When ready to serve, simply reheat them in a preheated oven or microwave.
8. Nutrition Information – A Balanced Indulgence
Each serving of Homemade Cheesy Breadsticks contains approximately 200 calories, depending on the thickness of the breadsticks and the amount of cheese and toppings used. Keep in mind that this is an estimate, and the actual calorie count may vary. While these breadsticks are a delicious treat, it’s important to enjoy them in moderation as part of a balanced diet.
9. Conclusion – Embrace the Cheesy Breadstick Magic
Making Homemade Cheesy Breadsticks at home is not only a simple and budget-friendly endeavor, but it’s also an incredibly satisfying experience. The aroma that fills your kitchen as they bake, the anticipation of that first cheesy bite, and the joy of sharing them with loved ones – it’s all part of the magic. Once you take a bite of these warm, cheesy, gooey wonders, you’ll never want to settle for store-bought breadsticks again. So, gather your ingredients, follow this comprehensive guide, and embark on your own cheesy breadstick adventure. The deliciousness that awaits is well worth the effort!
Print
Homemade Cheesy Breadsticks
Indulge in the deliciousness of Homemade Cheesy Breadsticks, perfectly baked for a gooey and delightful treat. These breadsticks are easy to make and ideal for any occasion, served with marinara sauce or your favorite dip.
- Total Time: 40 minutes
- Yield: 8 servings 1x
Ingredients
- 2 cups all-purpose flour
- 1 packet (2 1/4 tsp) active dry yeast
- 1 tsp sugar
- 1 tsp salt
- 3/4 cup warm water (about 110°F)
- 1 cup shredded mozzarella cheese
- 1/2 cup grated Parmesan cheese
- 1 tsp Italian seasoning
- 2 tbsp olive oil
Instructions
- In a large mixing bowl, combine warm water, yeast, and sugar. Let it sit for 5-10 minutes until frothy.
- Add flour and salt slowly until a dough starts to form.
- Flour a clean surface and knead the dough for 5-7 minutes until smooth and elastic.
- Place the dough in a greased baking pan and spread evenly.
- Preheat oven to 375°F (190°C). Sprinkle mozzarella and Parmesan cheese evenly over the dough.
- Add Italian seasoning and let the breadsticks rise for another 15 minutes.
- Bake for 20-25 minutes until golden brown and the cheese is bubbly.
Notes
- Allow breadsticks to cool before storing in an airtight container for up to 3 days.
- For longer storage, freeze in a freezer-safe bag.
- Consider using whole wheat flour for a denser texture.
- You can add herbs like basil or oregano to the dough for extra flavor.
- Prepare the dough ahead of time and freeze it until ready to bake.
- Prep Time: 15 minutes
- Cook Time: 25 minutes
- Category: Appetizer
- Method: Baking
- Cuisine: Italian
- Diet: Vegetarian
Nutrition
- Serving Size: 1 breadstick
- Calories: 200 Kcal
- Sugar: 1g
- Sodium: 280mg
- Fat: 8g
- Saturated Fat: 3g
- Unsaturated Fat: 4g
- Trans Fat: 0g
- Carbohydrates: 28g
- Fiber: 1g
- Protein: 8g
- Cholesterol: 15mg