Step-by-Step Guide to a Grand Slam Baseball Cake ⚾🎂🏆
1. Introduction
Are you ready to hit a home run at your next celebration? This step-by-step guide will teach you how to create the perfect baseball cake every time. Whether it’s for a birthday, team celebration, or just a fun get-together, a baseball themed cake is sure to be a crowd-pleaser. If you’re looking for other party ideas, maybe consider a delightful breakfast or brunch.
Forget complicated recipes and daunting instructions; we’re breaking down the process into easy-to-follow steps, ensuring that even novice bakers can achieve professional-looking results. We understand that baking can sometimes be intimidating, but with this guide, you’ll feel confident tackling this fun and rewarding project. We aim to make baking accessible to everyone, with clear, concise instructions that leave no room for guesswork.
So, grab your apron, and let’s get started on this delicious and decorative adventure! This baseball cake recipe is not only fun to make but also guarantees a delightful treat that captures the spirit of the game. It’s a fantastic way to combine your love for baking with your passion for baseball. Consider checking out other dessert recipes if you want alternatives.
2. Gathering Your Equipment and Ingredients
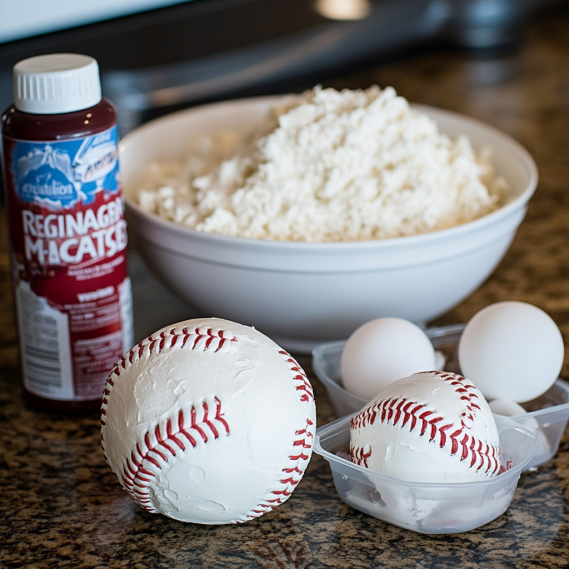
Before you begin, ensure you have all the necessary equipment and ingredients. This preparation will streamline the baking process and prevent any mid-recipe surprises. Having everything within reach will make the process far smoother and more enjoyable. Imagine having to stop mid-bake to run to the store – no fun! Here’s a comprehensive checklist:
- High-Quality Cake Mix (Vanilla or Chocolate, as preferred): Choosing a good cake mix can significantly impact the taste and texture of your final product.
- Ingredients per cake mix instructions (usually eggs, oil, and water): Make sure these are fresh for optimal results.
- Two 8-inch round cake pans: Ensure they are clean and in good condition to prevent sticking.
- White frosting (at least two containers): Opt for a smooth, creamy frosting that’s easy to work with.
- Red food coloring: Gel food coloring is recommended for vibrant, concentrated color.
- Piping bag and round tip: These are essential for creating the baseball stitches.
- Turntable (optional, but helpful for frosting): A turntable can make frosting smoother and more efficient.
- Serrated knife: This will be used to level the cake layers.
- Mixing bowls and utensils: Have a variety of sizes to handle different components of the recipe.
If you are missing any important utensil, please consider checking this website!
3. Baking the Cake
The foundation of any great baseball cake is, of course, the cake itself. A well-baked cake is moist, flavorful, and provides the perfect canvas for your creative decorations. Follow these straightforward steps for baking the perfect base:
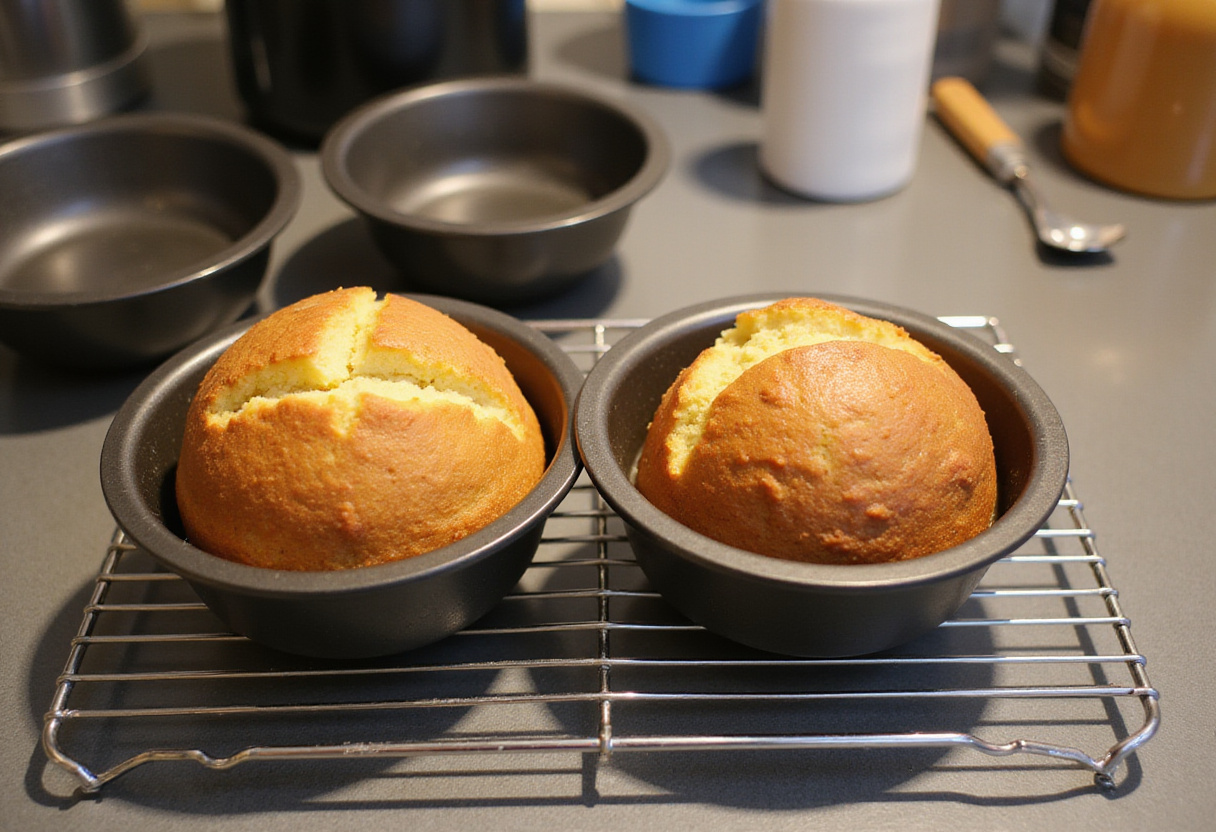
- Preheat your oven according to the cake mix instructions, typically around 350°F (175°C). Accurate oven temperature is crucial for even baking.
- Grease and flour your two 8-inch round cake pans. This will prevent the cake from sticking and ensure easy removal. Alternatively, you can use baking spray with flour already included.
- Prepare the cake batter according to the instructions on the cake mix box. Be careful not to overmix the batter, as this can result in a tough cake.
- Divide the batter evenly between the two cake pans. Using a kitchen scale can help ensure even layers.
- Bake for the time specified on the cake mix box, usually around 30-35 minutes. To check for doneness, insert a toothpick into the center of the cake. If it comes out clean, the cake is ready.
- Let the cakes cool in the pans for about 10 minutes before inverting them onto a wire rack to cool completely. Cooling the cakes completely prevents them from crumbling when you frost them.
4. Preparing the Frosting
While the cakes are cooling, it’s time to get the frosting ready. A smooth, well-colored frosting is crucial for achieving that authentic baseball themed cake look. The frosting not only adds sweetness but also provides the perfect surface for your decorating efforts. If you enjoy this baking experience, we have many more articles.
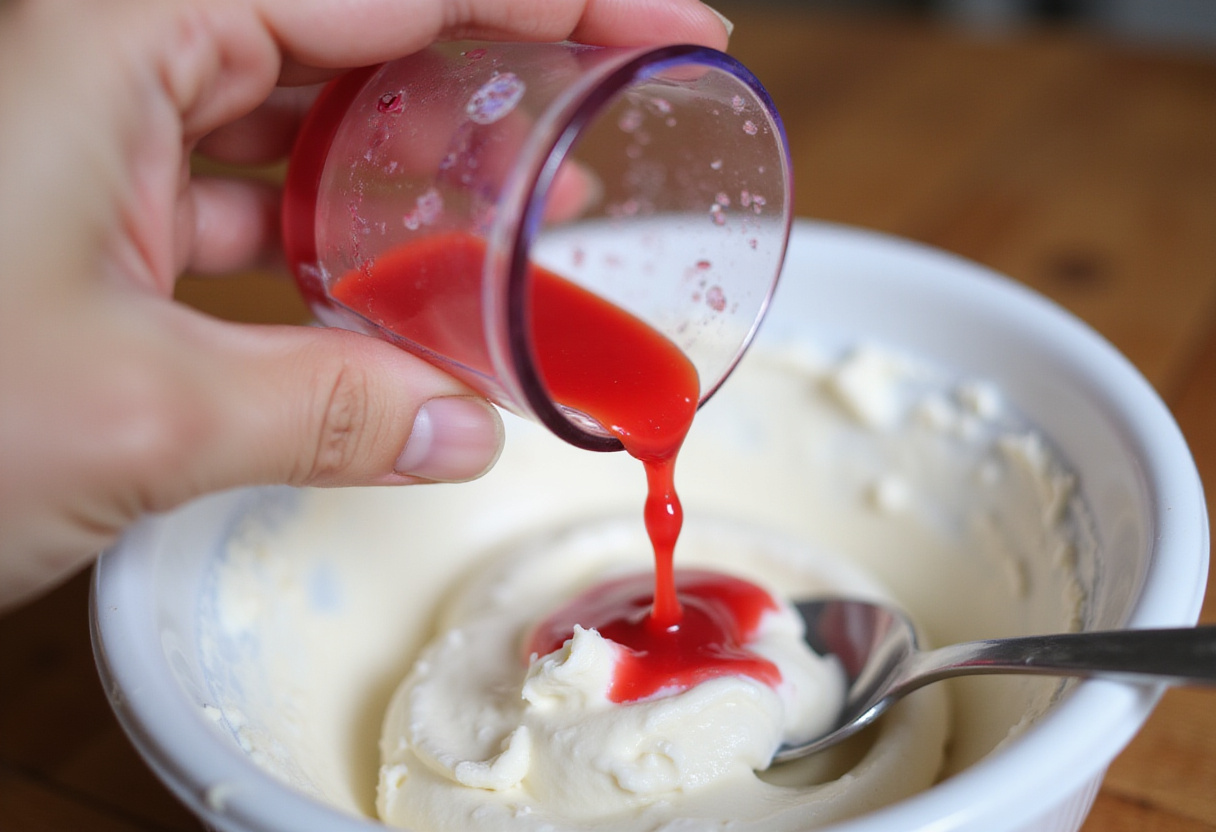
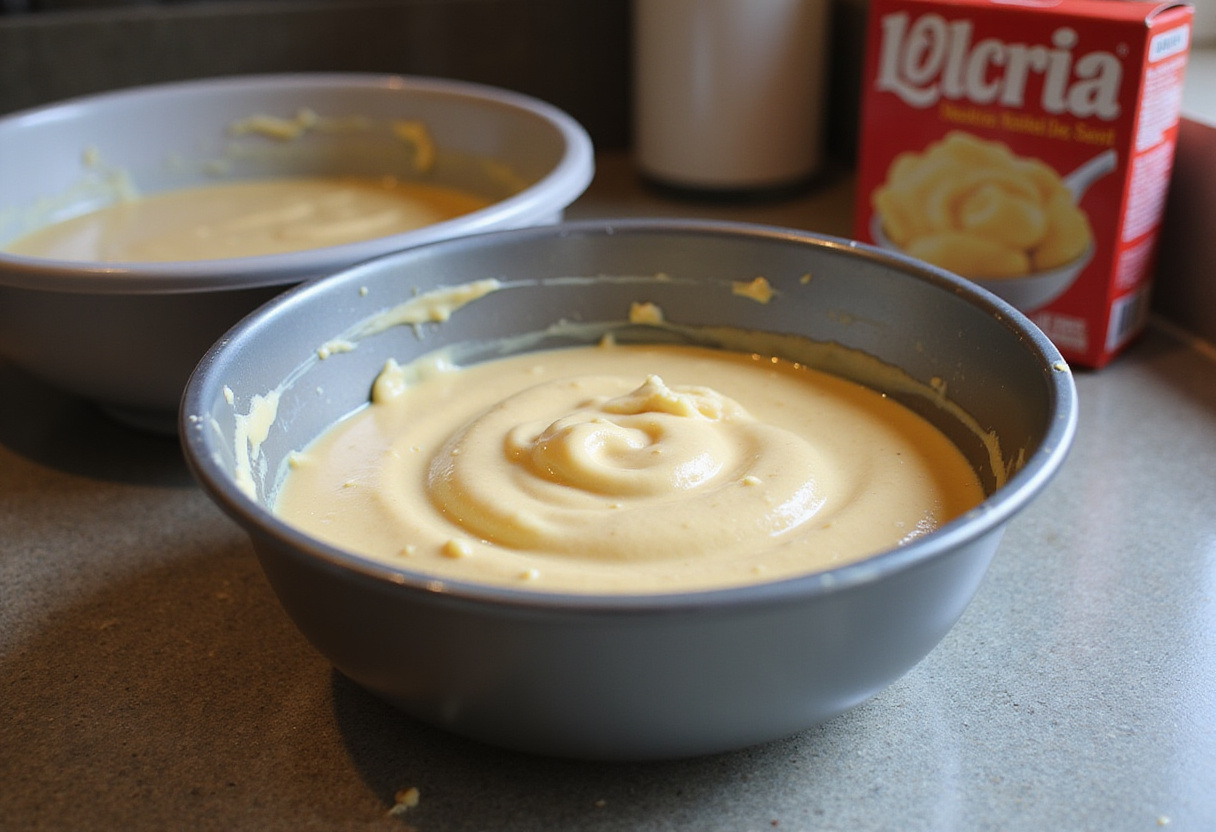
4.1. Coloring the Frosting
- Divide your white frosting into two bowls. Keep most of the frosting white, as this will be the base color of the baseball.
- In the second bowl, add red food coloring, a little at a time, until you achieve a vibrant red color. This will be used for the stitching on the baseball cake. Gel food coloring is ideal for achieving intense, consistent color without altering the frosting’s consistency.
- Mix the red food coloring thoroughly into the frosting, ensuring an even color distribution. Unevenly mixed frosting can result in a patchy, unprofessional look.
5. Assembling the Baseball Cake
Now for the fun part: assembling and decorating your baseball cake! This is where your creativity can truly shine. Assembling the cake requires patience and precision, but the end result is well worth the effort. Don’t hesitate to express yourself and make the cake your own. If you’d like to know more about us, check our ‘About’ section!
5.1. Leveling and Frosting
- Once the cakes are completely cool, use a serrated knife to level the tops. This will ensure the cake sits flat and is easier to frost. Leveling the cakes is a critical step for creating a professional-looking final product.
- Place one cake layer on a serving plate or cake stand.
- Spread a generous layer of white frosting on top of the first cake layer. A thick layer of frosting adds moisture and flavor to the cake.
- Carefully place the second cake layer on top of the frosting.
- Apply a thin crumb coat of white frosting over the entire cake. This seals in any loose crumbs and provides a smooth base for the final layer of frosting. The crumb coat is essential for preventing crumbs from mixing with the final frosting layer.
- Refrigerate the cake for about 30 minutes to allow the crumb coat to set. Chilling the cake makes the frosting process much cleaner and easier.
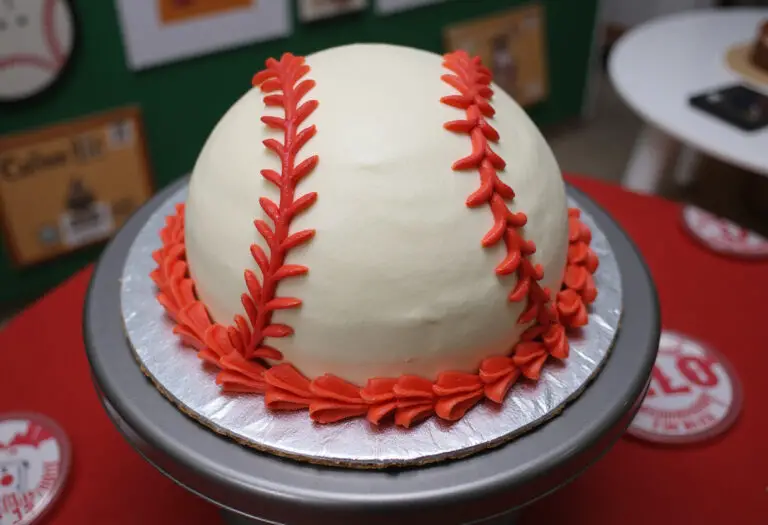
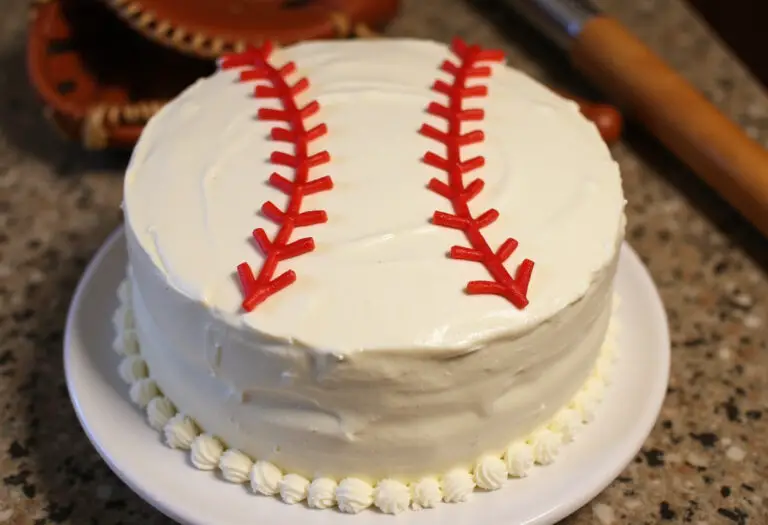
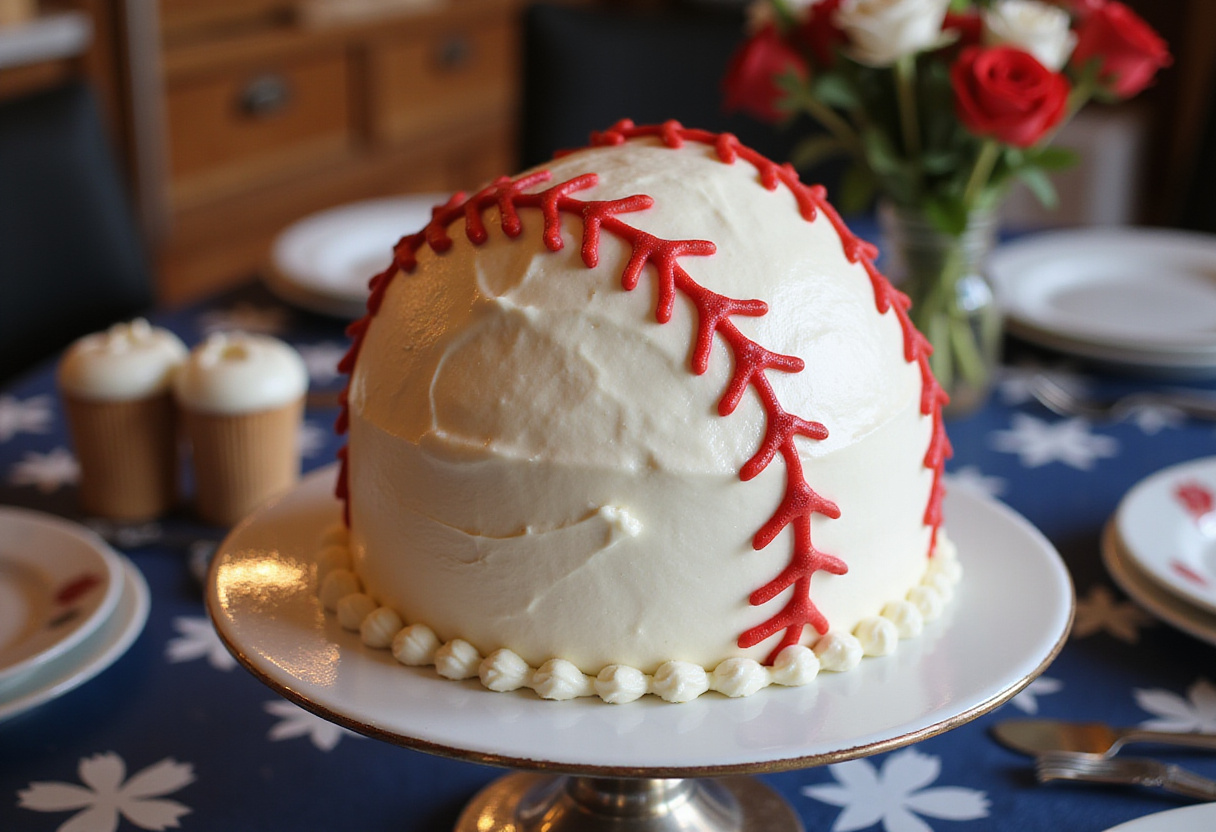
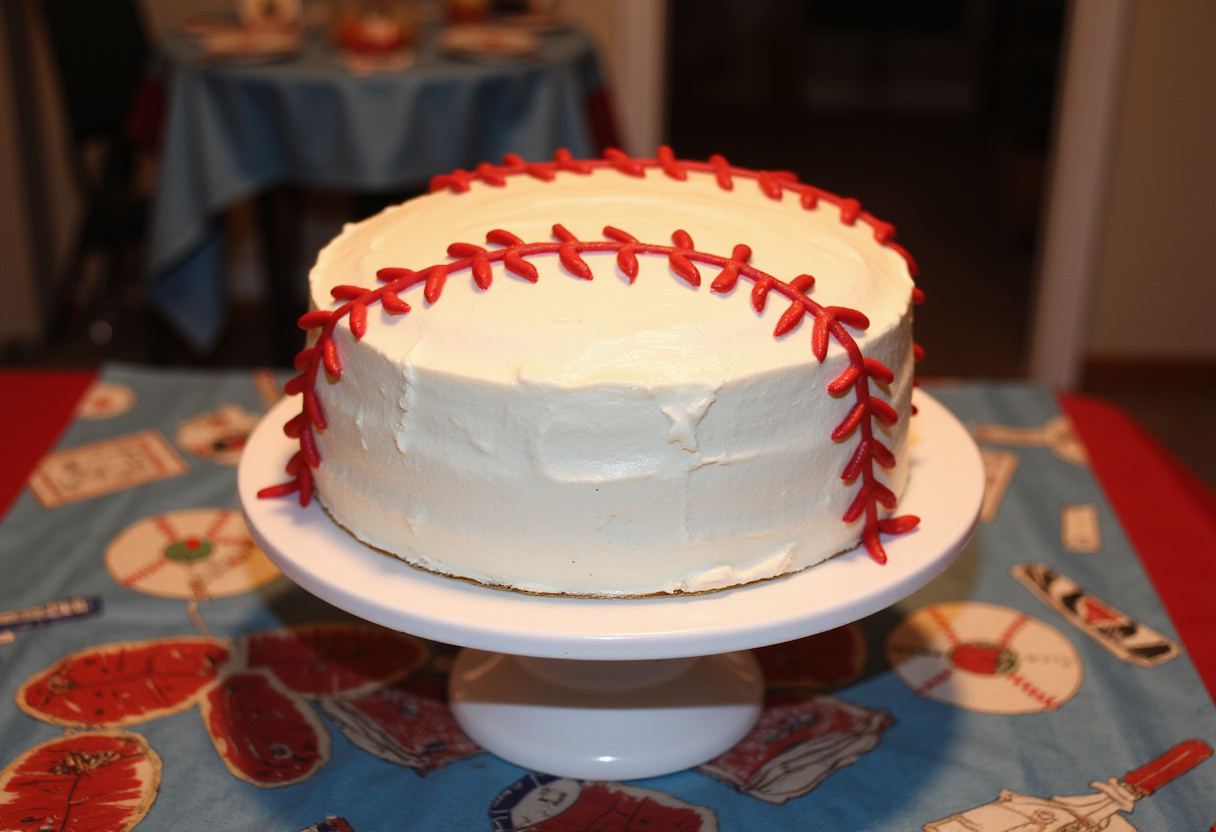
6. Decorating the Baseball Cake
Here’s where the baseball themed cake truly comes to life. The decoration is what transforms a simple cake into a stunning centerpiece. Follow these steps to add the iconic baseball stitching:
6.1. Final Frosting Layer
- Apply a thick, even layer of white frosting over the entire cake. Use a spatula or icing smoother to create a smooth surface. A smooth frosting layer is essential for a polished, professional appearance.
6.2. Adding the Stitches
- Fill a piping bag with the red frosting and fit it with a small, round tip.
- To create the baseball stitches, pipe two curved lines that meet in the middle on one side of the cake. Repeat on the opposite side. These curved lines form the basic structure of the baseball stitching.
- Add small, individual stitches along these lines, mimicking the look of real baseball stitching. Pay attention to the spacing and size of the stitches for a realistic effect.
7. Tips and Tricks for the Perfect Baseball Cake
To ensure your baseball cake recipe is a home run, consider these additional tips:
- Use a turntable for easier frosting and decorating. A turntable allows you to rotate the cake smoothly while frosting, resulting in an even, professional finish.
- Chill the cake between frosting layers to make the process smoother. Chilling the cake firms up the frosting, making it easier to apply subsequent layers without disturbing the previous one.
- If you don’t have a piping bag, you can use a plastic bag with a small hole cut in the corner. This is a great alternative for those who don’t have professional piping equipment.
- Get creative with additional decorations such as edible glitter, baseball-themed toppers, or personalized messages. Adding extra decorations can make your cake even more special and personalized.
Have fun with this recipe, and if you’d like to work with me, visit the ‘Work With Me’ page.
8. Storing Your Baseball Cake
Proper storage will keep your baseball cake fresh and delicious. Follow these tips to maintain the quality of your cake:
- Store the cake in an airtight container in the refrigerator. This prevents the cake from drying out and absorbing unwanted odors.
- It will stay fresh for up to 3-4 days. Be sure to consume it within this timeframe for the best flavor and texture.
- For longer storage, you can freeze the cake. Wrap it tightly in plastic wrap and then in foil. It can be frozen for up to 2-3 months. Thaw in the refrigerator before serving. Freezing is a great way to preserve the cake for future enjoyment.
9. Conclusion
Congratulations! You’ve successfully created a stunning baseball cake. With this easy baseball cake tutorial ,you’re now equipped to impress friends and family with your baking skills. This baseball themed cake is perfect for any sports enthusiast’s special day. Enjoy the cheers and applause as you serve up this delightful treat. Remember, baking should be fun, so don’t be afraid to experiment and add your own personal touch. If you are looking for a quick meal to cook with, try one of our dinner recipes. Happy baking!
Print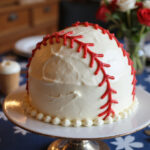
Step-by-Step Guide to Perfect Baseball Cake Every Time
- Total Time: 1 hour 5 minutes
- Yield: 12 servings 1x
- Diet: Vegetarian
Description
Create a winning dessert with our step-by-step baseball cake guide! Perfect for birthdays or team celebrations, this easy baseball cake recipe ensures a home run every time. Learn how to bake, assemble, and decorate a baseball themed cake that will impress your friends and family. Let’s make a grand slam dessert!
Ingredients
- Cake Mix (Vanilla or Chocolate)
- Eggs, oil, and water (as per cake mix instructions)
- Two 8-inch round cake pans
- White frosting (at least two containers)
- Red food coloring
- Piping bag and round tip
- Turntable (optional)
- Serrated knife
- Mixing bowls and utensils
Instructions
- Preheat oven to 350°F (175°C). Grease and flour two 8-inch round cake pans.
- Prepare cake batter according to cake mix instructions. Divide evenly between pans.
- Bake for 30-35 minutes, or until a toothpick inserted into the center comes out clean.
- Let cakes cool in pans for 10 minutes, then invert onto a wire rack to cool completely.
- Divide white frosting into two bowls. Add red food coloring to one bowl until vibrant red. Mix well.
- Level the tops of the cooled cakes with a serrated knife.
- Place one cake layer on a serving plate. Spread a generous layer of white frosting on top.
- Place the second cake layer on top of the frosting. Apply a thin crumb coat of white frosting over the entire cake.
- Refrigerate the cake for 30 minutes to allow the crumb coat to set.
- Apply a thick, even layer of white frosting over the entire cake.
- Fill a piping bag with red frosting and fit with a small, round tip.
- Pipe two curved lines that meet in the middle on one side of the cake. Repeat on the opposite side.
- Add small, individual stitches along these lines, mimicking the look of real baseball stitching.
Notes
- Use a turntable for easier frosting and decorating.
- Chill the cake between frosting layers to make the process smoother.
- If you don’t have a piping bag, use a plastic bag with a small hole cut in the corner.
- Get creative with additional decorations such as edible glitter, baseball-themed toppers, or personalized messages.
- Store the cake in an airtight container in the refrigerator for up to 3-4 days.
- For longer storage, freeze the cake wrapped tightly in plastic wrap and foil for up to 2-3 months. Thaw in the refrigerator before serving.
- Prep Time: 30 minutes
- Cook Time: 35 minutes
- Category: Dessert
- Method: Baking
- Cuisine: American
Nutrition
- Serving Size: 1 slice
- Calories: 350 Kcal
- Sugar: 40g
- Sodium: 250mg
- Fat: 15g
- Saturated Fat: 8g
- Unsaturated Fat: 6g
- Trans Fat: 0g
- Carbohydrates: 50g
- Fiber: 1g
- Protein: 3g
- Cholesterol: 50mg
Keywords: baseball cake, baseball themed cake, easy baseball cake, baseball cake recipe, sports cake, birthday cake, cake decorating, step-by-step cake, cake tutorial